
You’ve probably reached the point where a local test install isn’t enough anymore. You want OpenClaw reachable from the internet, isolated from the rest of your stack, restartable after a reboot, and secure enough that you won’t regret exposing it later. That’s where a plain VPS starts to make sense.
The problem is that most guides stop right after “run the installer.” That’s not the hard part. The hard part is getting permissions, persistent storage, reverse proxying, HTTPS, and operational hygiene right so the instance still works a week later. If you’re learning how to install openclaw on a vps for a real workload, those details matter more than the first command.
Table of Contents
- Laying the Groundwork Your VPS Server Preparation
- The Core Installation Using Docker and Traefik
- Post-Install Configuration and Environment Variables
- Configuring Networking SSL and Public Access
- Running as a Service and Security Hardening
- Beyond One Instance Scaling and Management with Donely
Laying the Groundwork Your VPS Server Preparation
Production installs fail early for boring reasons. The VM is undersized, the admin logs in as root for convenience, SSH is left too open, or package updates are skipped because the app install feels more urgent. Those shortcuts create fragile systems.
For OpenClaw on Ubuntu, use at least 4 GB RAM, 2 CPUs, and 100 GB SSD storage for smooth performance, and only start the automated install after hardening the server, using the documented installer command curl -fsSL https://openclaw.ai/install.sh | bash as described in BitLaunch’s OpenClaw VPS setup guide. If you’re still deciding whether a VPS is the right hosting shape at all, Cloudvara's server solutions give a useful comparison between VPS and dedicated infrastructure.
Pick the right baseline first
Ubuntu is the safe default for a first production deployment. It’s predictable, well documented, and widely supported by VPS providers. Start from a fresh image rather than repurposing an old machine with leftover packages and unknown firewall rules.
Keep your prep checklist short and disciplined:
- Create a non-root user so daily administration doesn’t happen as root. If a command goes wrong, the blast radius stays smaller.
- Add your SSH public key to that user before you tighten access. Password logins are where a lot of avoidable trouble begins.
- Update the operating system immediately after first login. You want current packages and security fixes before Docker and app dependencies land.
- Set firewall rules with UFW so only the ports you need are reachable.
- Confirm hostname and time settings because certificate issuance, logs, and troubleshooting get messy when the server identity is inconsistent.
Practical rule: if you wouldn’t hand the server to another engineer in its current state, it isn’t ready for the installer.
Harden the box before installing anything
The biggest mistake junior operators make is thinking security hardening is a later task. It isn’t. If OpenClaw will be internet-facing, secure the OS first, then add containers.
A sensible order looks like this:
- Log in with your initial admin access.
- Create a dedicated non-root user.
- Install that user’s SSH key and verify you can log in.
- Apply updates.
- Enable the firewall with only required access.
- Disable habits that keep root as the daily operator.
If you want to skip this entire infrastructure layer for future deployments, managed OpenClaw hosting exists precisely because repeating these baseline steps across multiple instances gets tedious fast.
The Core Installation Using Docker and Traefik
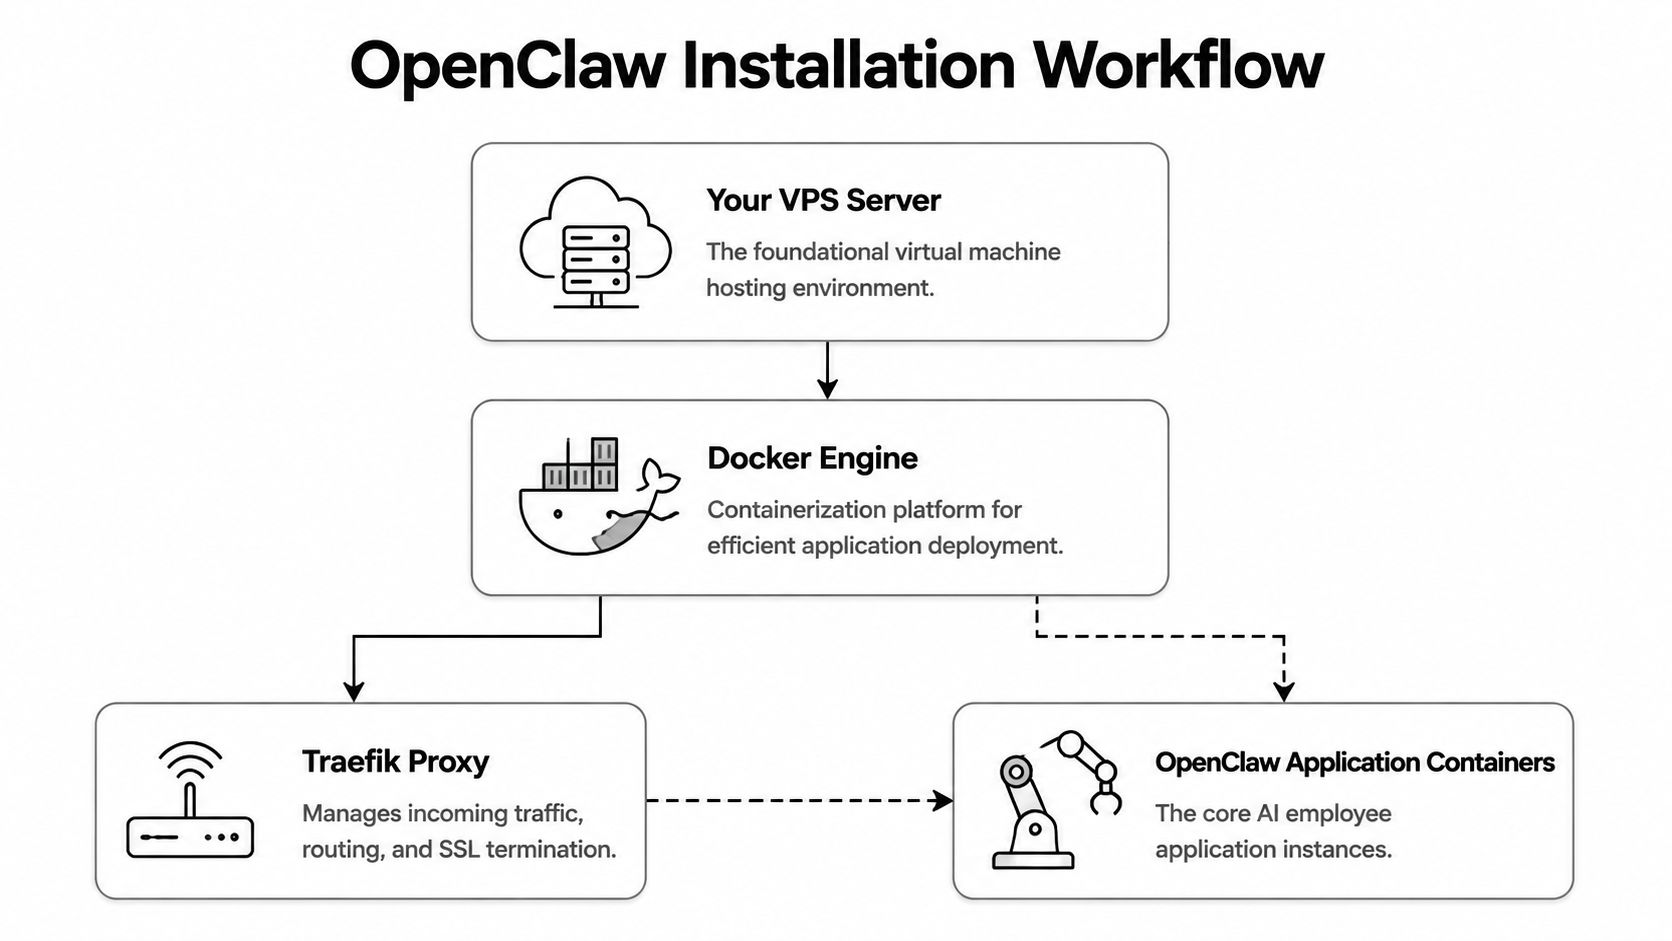
A production OpenClaw install should run in containers. Not because containers are fashionable, but because they solve practical problems: dependency isolation, repeatable deployment, and simpler rollback when you break something. Pair that with Traefik and you also get a clean edge layer for HTTPS and request routing.
The architecture is easier to reason about when you picture the flow first.
Why Docker and Traefik are the production path
Production deployments rely on Docker plus a Traefik reverse proxy, and a critical requirement is configuring Docker daemon user-group permissions so you can run Docker without sudo, which avoids ownership conflicts in generated .env files and persistent data mounted to ~/.openclaw, as documented in QuantVPS’s installation walkthrough.
That one detail causes a disproportionate number of broken installs. If you run setup commands with sudo, files and directories under the mounted paths often end up owned by root. Later, the container tries to read or write them under a different user context and fails in ways that look like random app bugs.
Run Docker as the properly configured user, not as a shortcut through
sudo. It saves hours of cleanup later.
The other piece is networking. Traefik sits in front of the OpenClaw container, terminates SSL/TLS, and forwards traffic internally over the Docker network. That gives you one clean place to manage public access instead of exposing the app container directly.
Run the installer the right way
Before running the installer, make sure three things are true:
| Check | Why it matters |
|---|---|
| Your user can run Docker without sudo | Prevents file ownership and volume permission issues |
| The proxy network exists as expected | Lets Traefik and OpenClaw talk cleanly |
| Persistent storage paths are writable | Keeps config and workspace data durable across restarts |
The install flow itself is straightforward once the OS and Docker user permissions are correct. You’ll run the official script from your non-root user session and let it scaffold the containerized deployment.
Later in the process, remember the expected storage layout. OpenClaw uses ~/.openclaw for configuration and ~/.openclaw/workspace for agent data. Treat those paths like application state, not scratch space.
A quick visual walkthrough helps if you want to compare what you see on screen against a live example:
What the prompts actually mean
The interactive prompts matter more than they seem. They’re not cosmetic.
Expect to make choices around:
- Authentication provider. The installer offers provider selection, with an Anthropic API key presented as the recommended default in the documented setup flow.
- Shell completion. Enable this if you’ll manage the system regularly from the command line. It reduces operator error.
- Package manager for skills.
npmis the preferred package manager in the documented flow for skills installation.
If a prompt feels ambiguous, stop and think about operations, not just day-one setup. Pick defaults that another engineer could understand later.
Common failure modes at this stage usually come from one of four causes:
- Wrong user context and Docker permission mismatch
- Partially installed Docker from old experiments
- Volume paths created by root
- Proxy network assumptions that don’t match the generated config
When that happens, resist the temptation to patch around it. It’s usually faster to clean up the broken container state and reinstall correctly than to chase permission drift for the rest of the deployment.
Post-Install Configuration and Environment Variables
The install gets the stack running. The .env file is what turns it into your stack. Most production mistakes become invisible at this stage, because the system starts, but authentication, dashboard access, or integrations don’t behave the way you expect.
Treat environment configuration like code. Review it carefully, store it securely, and keep changes intentional.
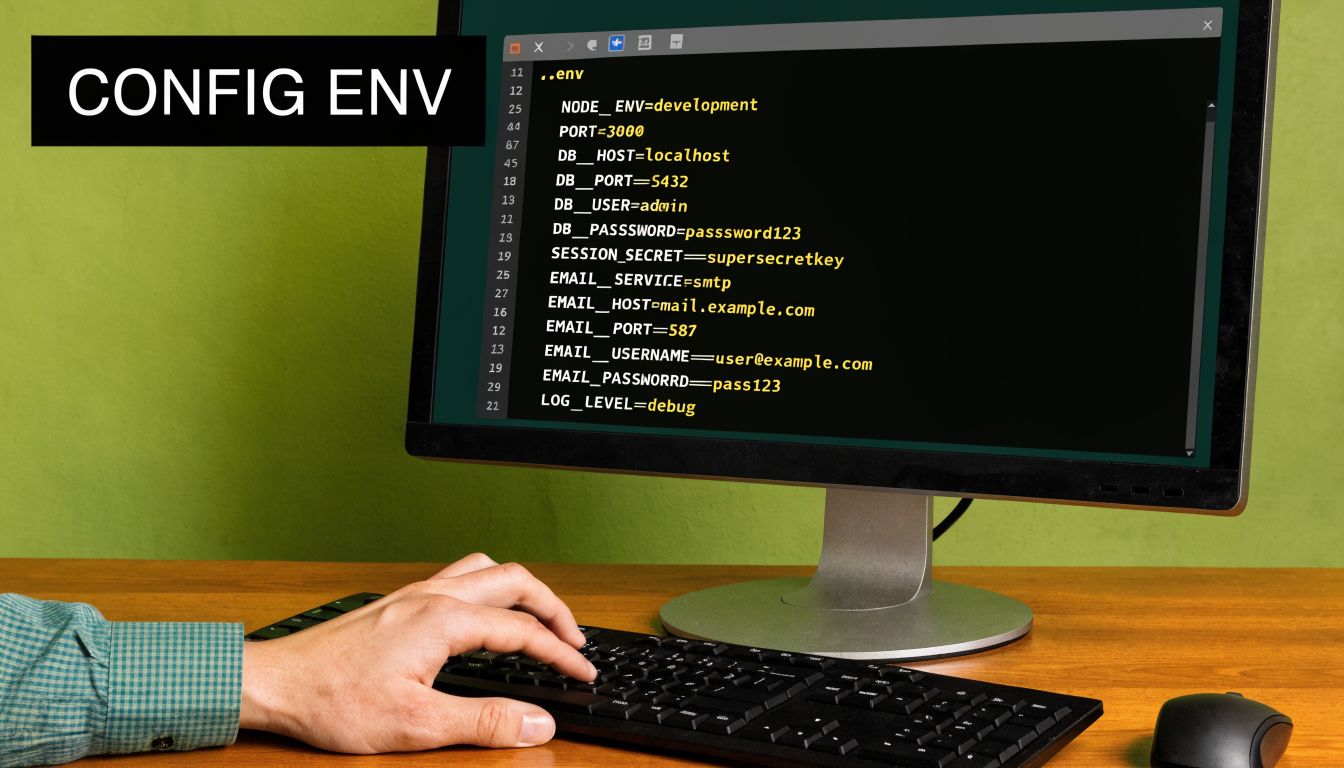
Treat the env file like production config
Open the generated .env file and validate each variable instead of assuming the installer got everything exactly how you want it. In a real deployment, this file controls provider credentials, runtime behavior, and how the instance identifies itself to the rest of the OpenClaw ecosystem.
Focus on the variables that define:
- Authentication settings for the provider you selected during install
- Secrets used for sessions or application security
- Gateway-related values that tie the instance to its management surface
- Domain and proxy assumptions if your generated setup expects public routing
A good habit is to annotate your internal runbook with what each variable is for. Not inside the file if that increases risk, but in your operational notes. Six months from now, you won’t remember which secret was rotated and why.
The token you cannot afford to lose
The most important value in this stage is OPENCLAW_GATEWAY_TOKEN. The deployment process generates it, and it acts as the authentication key for connecting the VPS instance to the centralized OpenClaw dashboard. It must be stored securely, and if you lose it, you can’t recover it. You’ll need to redeploy the containerized instance to get a new one.
Operational note: copy the gateway token once, store it in your secrets manager immediately, and verify that another authorized operator can retrieve it if you’re unavailable.
This token-based model is useful when you run isolated instances. It lets you control access per instance without handing out broader shared credentials. That’s clean from a governance standpoint, but only if you manage the token like a real secret.
Practical storage options include a team password manager, a secret vault, or an encrypted internal credential store. Don’t leave it in shell history, a temporary note, or a local text file on your laptop.
Configuring Networking SSL and Public Access
Once the containers are healthy, public access becomes the ultimate test. An internal app that only works over localhost is a lab exercise. A usable production deployment needs a domain, clean routing, and HTTPS that stays out of your way.
Traefik excels in this role. Instead of wiring SSL into the app itself, you let the reverse proxy handle ingress, certificates, and routing policy.

How traffic should flow
Think in layers:
- A user requests your OpenClaw domain.
- DNS points that domain at the VPS.
- Traefik receives the HTTPS request.
- Traefik applies routing rules and forwards traffic to the OpenClaw container on the internal Docker network.
That separation is what keeps the deployment manageable. The app doesn’t need to be directly exposed. Traefik becomes the single public entry point.
Here’s the minimum routing model you want to confirm:
| Layer | Responsibility |
|---|---|
| DNS | Sends your domain to the VPS |
| Traefik | Terminates TLS and routes requests |
| OpenClaw container | Handles application logic only |
The important operational detail is that DNS records for your chosen domain must point to the VPS before certificate automation can work properly. If the public name doesn’t resolve to the server, Traefik can’t complete the normal SSL flow.
Keep your edge simple. One reverse proxy, one public domain per instance, and explicit routing rules beat clever networking every time.
If you’d rather avoid managing reverse proxies and certificate lifecycle yourself, hosted infrastructure for OpenClaw is the category to look at when operational overhead starts outweighing control.
What to verify when HTTPS does not come up
When HTTPS fails, don’t start by blaming the app. Start at the edge.
Check these in order:
- Domain resolution. Confirm your public hostname resolves to the VPS you configured.
- Traefik container health. If the proxy isn’t running, nothing behind it matters.
- Network attachment. The app container and Traefik need to share the expected Docker network.
- Router labels or dynamic config. A typo in host matching is enough to make the app appear offline.
- Firewall exposure. If you’ve locked things down correctly, make sure you didn’t also block the traffic your proxy needs.
If you want a broader checklist for edge exposure and app-level protection, this guide on securing your web applications is worth keeping nearby during review. It’s not OpenClaw-specific, but the operational principles map cleanly to any public-facing service.
Running as a Service and Security Hardening
A VPS install isn’t done when the container first starts. It’s done when the service survives a reboot, logs useful errors, and doesn’t leak secrets through sloppy operations.
You need two things here: reliable startup behavior and boring, disciplined hardening.
Make it survive reboots cleanly
For a production setup, wrap your Docker Compose or equivalent container startup in a systemd service so the stack comes back automatically after host reboots. Keep the service owned by the same user context you used for the deployment. Mixing root-run service management with user-owned Docker files is how permission drift sneaks back in.
A solid systemd approach gives you:
- Automatic startup on boot so maintenance reboots don’t become outages
- Controlled restarts if the process exits unexpectedly
- Readable status checks through the host’s service manager
- A single operational entry point for start, stop, and restart actions
Don’t overcomplicate the unit file. The job is to run the container stack consistently, not to hide every possible edge case in shell logic.
Security work that people skip
The next layer is mostly about restraint.
- Keep secrets out of shell history. Exporting credentials interactively is convenient and risky.
- Review container logs regularly for authentication failures, crash loops, or odd request patterns.
- Limit who can read mounted data under the OpenClaw storage paths.
- Patch the host on a schedule instead of waiting until a dependency breaks.
- Use least privilege for integrations so a compromised tool connection doesn’t become a broad account problem.
A secure deployment usually looks ordinary. Minimal privileges, clear ownership, patching discipline, and no mystery access paths.
If you run more than one instance, document who owns each environment, who can restart it, and where its secrets live. Most operational failures come from ambiguity, not from lack of tools.
Beyond One Instance Scaling and Management with Donely
A single VPS install is manageable. The second one is still fine. By the time you’re running separate environments for personal workflows, a client project, staging, and production, the friction changes shape. You stop thinking about OpenClaw itself and start spending time on repeated infrastructure chores.
Where manual VPS installs start to hurt
The pain points are predictable:
- Every instance has its own lifecycle. Updates, certificates, secrets, and restarts all need attention.
- Isolation is your responsibility. You have to keep client workloads separated and permissions tight.
- Access control gets messy when multiple operators need different levels of access.
- Billing and monitoring scatter across providers, hosts, and hand-kept notes.
This is also where teams start looking at examples from the ecosystem. If you want another deployment perspective, learn about Clawify's Openclaw deployment as a reference point for how others frame the operational problem.
When a managed control plane makes more sense
Managed platforms like Donely reduce OpenClaw deployment time to under two minutes, support multi-instance architecture for isolated agents, offer plans from a free tier to enterprise options, include a 99.9% uptime SLA, and support 850+ tool integrations, according to this Donely product overview video.
That matters when you no longer want to rebuild the same stack for every new workload. The value isn’t magic. It’s the removal of repeated DevOps tasks you already understand but don’t want to keep redoing. If you’re evaluating that path, this overview of AI employee agent hosting is a practical next read.
The trade-off is straightforward. Manual VPS deployment gives you direct infrastructure control and a good understanding of how the system works. Managed deployment gives you speed, easier governance, and a cleaner path once you need isolated environments for multiple clients or teams.
If you want to stop managing VPS setup, Docker permissions, reverse proxies, and per-instance overhead by hand, Donely provides a unified way to host and manage OpenClaw-powered AI employees from one dashboard while keeping instances isolated for different workloads.