
You've probably got a Mac mini sitting on a shelf, half workstation and half experiment, and you want it to become something more predictable than a dev box with a terminal window left open. That's the core OpenClaw Mac mini setup problem. Installation is the easy part. Keeping the agent available after a reboot, after a power blip, or after a messy process restart is where most setups drift from “works” to “I trust this.”
A good local setup treats the Mac mini like an appliance. That means tight network exposure, persistent storage, clean startup behavior, and a recovery path when the gateway disappears. The reason this pattern keeps coming up is practical: a widely cited OpenClaw build uses a Mac mini M4-class machine with 16 GB RAM at roughly $600, drawing only 8 to 15 W while running continuously, which makes it viable for always-on agent workloads without dedicated-server overhead, according to GetOpenClaw's Mac mini guide.
Table of Contents
- Preparing Your Mac Mini for OpenClaw
- Installing Core Dependencies and OpenClaw
- Essential Configuration for a Usable Agent
- Security Hardening and Performance Tuning
- Ensuring Long-Term Reliability and Recovery
- Scaling Up From Local Host to Managed Platform
Preparing Your Mac Mini for OpenClaw
A Mac mini works well for OpenClaw when you stop thinking of it as “my spare Mac” and start treating it like single-purpose infrastructure. Leave the personal apps off it. Don't pile unrelated experiments onto the same user account. If this machine is going to stay on all the time, every extra moving part becomes one more thing to break in the background.
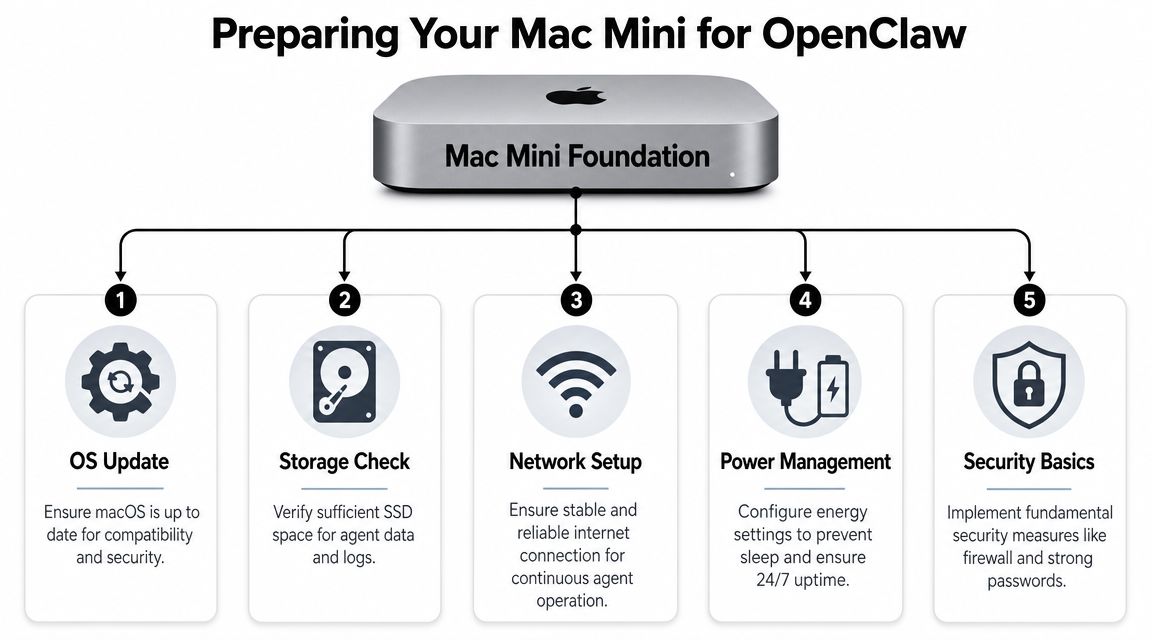
Treat the Mac mini like an appliance
Use a dedicated local admin account, then decide whether OpenClaw itself should run under that account or under a separate service-oriented user. If this is your first pass, one dedicated machine-level account is fine. What matters is consistency. You don't want your primary daily-use account carrying browser sessions, developer tooling, and an always-on agent process at the same time.
The Mac mini also benefits from its form factor. It's small enough to run headless and quiet enough to ignore, but that convenience can hide bad habits. People often leave these machines in a half-desktop state with sleep settings, random login items, and consumer sharing features turned on. That's how “always on” becomes “usually reachable.”
Practical rule: If you wouldn't configure it this way for a tiny internal server, don't do it just because the hardware happens to be a Mac.
Baseline checks before you install anything
Before touching Homebrew or Node, get the host into a stable state:
- Update macOS: Install pending system updates first so you aren't debugging around a forced reboot later.
- Check free storage: OpenClaw itself isn't the only thing writing to disk. Logs, model-adjacent artifacts, agent state, and backups all accumulate.
- Use stable networking: Ethernet is preferable when the Mac mini is going to act like a service node.
- Adjust power behavior: Disable settings that let the machine become unavailable when idle.
- Enable remote administration deliberately: If it's going into a rack or closet, configure remote access before you remove the monitor.
One setup guide describes the basic headless flow clearly: enable Remote Desktop, turn on Time Machine, and configure automatic restart after power loss so the machine can move off-desk and keep operating unattended, as outlined in Dirk Paessler's setup guide.
A simple preflight checklist looks like this:
| Area | What to verify | Why it matters |
|---|---|---|
| OS state | Current macOS updates applied | Fewer surprise reboots and compatibility issues |
| User model | Dedicated account | Cleaner permissions and less accidental breakage |
| Storage | Healthy free SSD space | Prevents silent failures from full disks |
| Remote access | Screen sharing or remote desktop working | Needed for headless administration |
| Backup | Time Machine enabled | Makes rollback possible after bad config changes |
If your goal is a dependable OpenClaw Mac mini setup, this prep work isn't ceremony. It's the difference between a system you can ignore and one you have to babysit.
Installing Core Dependencies and OpenClaw
The installation path should stay boring. That's a good sign. Several setup guides describe the minimal workflow as low-friction: install Homebrew and Node, install OpenClaw, initialize the gateway, then verify status. One guide says that secure baseline can be done in about 10 minutes, as noted in this setup walkthrough.
Install the base toolchain
Start with Homebrew if it isn't already present:
/bin/bash -c "$(curl -fsSL https://raw.githubusercontent.com/Homebrew/install/HEAD/install.sh)"
Then install Node:
brew install node
Confirm both:
brew --version
node --version
npm --version
Install OpenClaw globally:
npm install -g openclaw
Check that the binary resolves:
openclaw --help
This sequence is intentionally plain. For most Mac mini deployments, plain wins. Every extra wrapper you add during first install makes troubleshooting harder when onboarding fails.
Choose native or containerized runtime
You have two reasonable options.
Native execution is the fastest way to get running on macOS. It fits the common Homebrew plus Node workflow, integrates cleanly with launchd later, and keeps your file paths and logs straightforward.
Containerized execution gives you stronger isolation. It's useful if you want clearer boundaries around dependencies, mounted volumes, or multi-instance testing. The trade-off is operational complexity. You now have Docker or Podman lifecycle, image updates, volume mapping, and another layer to debug when launch behavior gets weird.
For a single always-on Mac mini node, I'd start native unless you already know you need strict isolation. The installation surface stays smaller, and recovery tooling with launchd tends to be simpler.
Keep the first deployment easy to reason about. Isolation only helps if you're prepared to operate it.
Run onboarding and verify health
Once the binary is installed, initialize OpenClaw:
openclaw onboard
Follow the prompts carefully. People often create future headaches at this point by accepting broad exposure defaults or rushing through auth setup.
After onboarding, verify that the gateway comes up and responds:
openclaw gateway status
openclaw health
If your install uses a different status or health subcommand name, stick with the current CLI output. The important part is not the exact verb. It's that you confirm the process is present, reachable through the expected interface, and using the configuration you think it is.
For headless operation, finish the host-level milestones now rather than later:
- Enable remote access before shelving the machine
- Confirm automatic restart behavior after power loss
- Verify the OpenClaw process can start without an interactive terminal
- Record the config and data paths you'll use for maintenance
A successful install isn't “I saw the prompt once.” It's “I can restart the host and still find the gateway where I expect it.”
Essential Configuration for a Usable Agent
A running OpenClaw process is not the same thing as a useful agent. The difference is state. If memory, logs, and config vanish on restart, you didn't build a service. You built a demo.
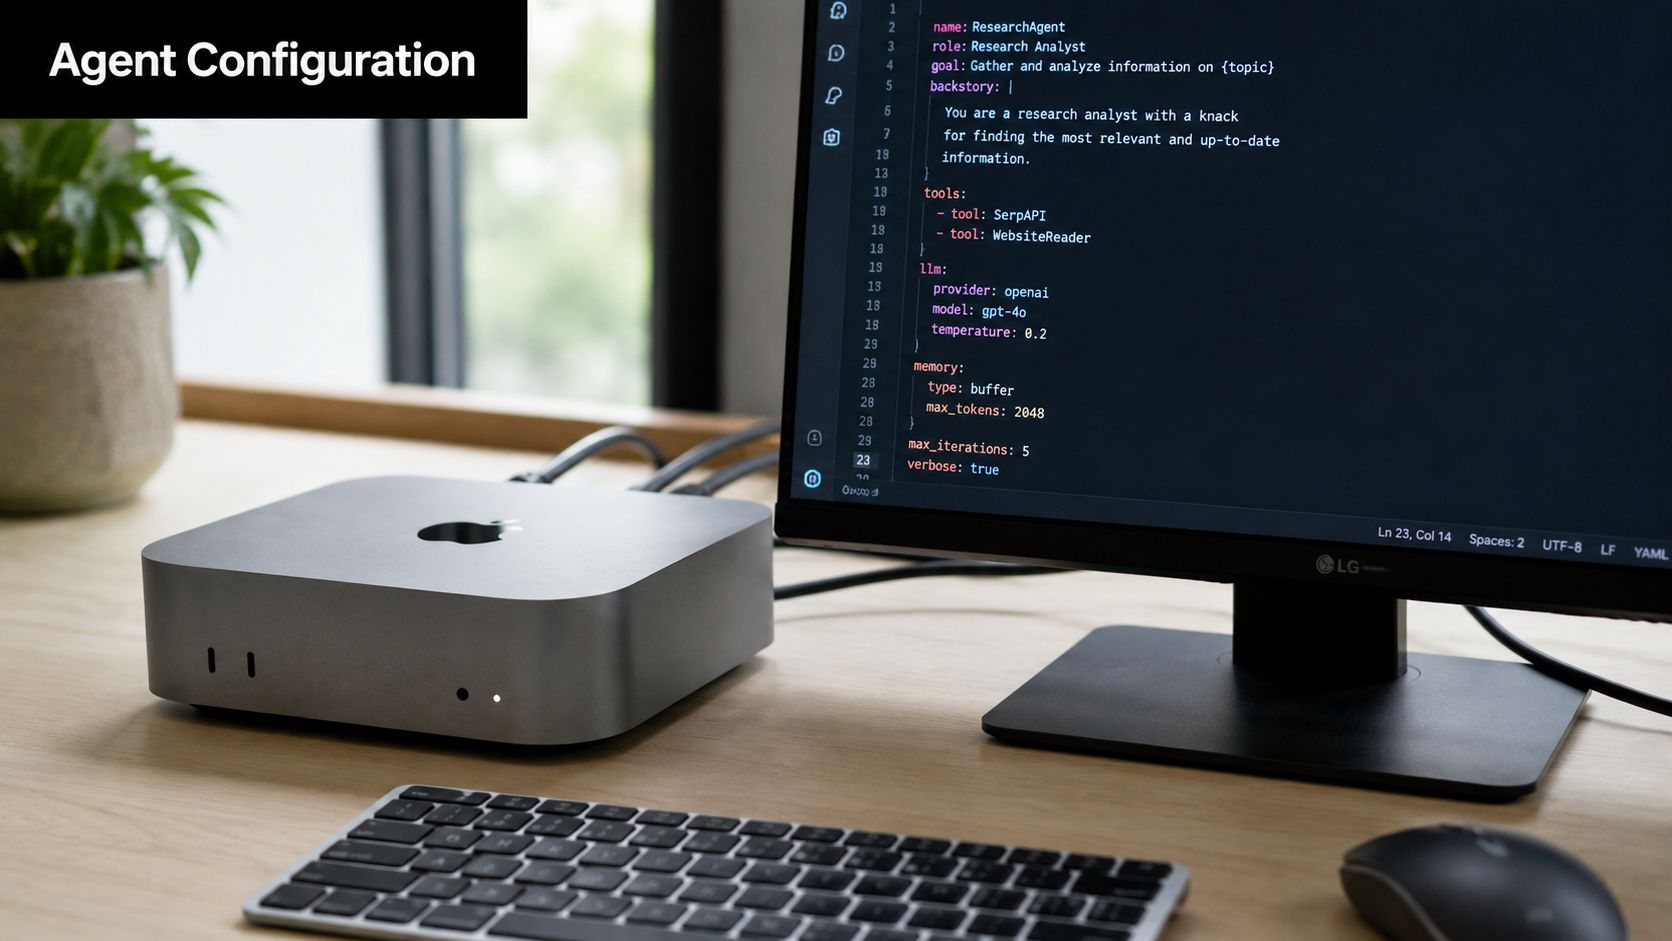
Persist the data you actually care about
Decide on a stable directory layout before you add channels, skills, or custom workflows. I like a structure that keeps config, runtime data, and logs separate:
mkdir -p ~/openclaw/{config,data,logs,scripts}
That separation pays off later. Backups are cleaner, log rotation is easier, and you won't confuse generated files with hand-maintained configuration.
If you run OpenClaw in a container, map those directories explicitly as volumes. If you run it natively, point the service to those paths through its config or environment variables rather than letting it scatter state under changing defaults.
A practical layout:
| Path | Purpose | Keep persistent |
|---|---|---|
~/openclaw/config |
Main config and environment files | Yes |
~/openclaw/data |
Agent memory and runtime state | Yes |
~/openclaw/logs |
Gateway and task logs | Yes |
~/openclaw/scripts |
Helper scripts and maintenance jobs | Yes |
Use environment files instead of editing ad hoc
You want configuration that's easy to diff and easy to restore. A local environment file is simple and serviceable:
mkdir -p ~/openclaw/config
touch ~/openclaw/config/openclaw.env
chmod 600 ~/openclaw/config/openclaw.env
Example contents:
OPENCLAW_DATA_DIR=/Users/youruser/openclaw/data
OPENCLAW_LOG_DIR=/Users/youruser/openclaw/logs
OPENCLAW_GATEWAY_BIND=127.0.0.1
OPENCLAW_REQUIRE_TOKEN=true
OPENCLAW_DM_POLICY=pairing
The variable names can differ by version. What matters is the pattern. Keep secrets and behavior overrides outside the app package, and load them consistently from one place.
This becomes more important as you add integrations. If the agent will touch SaaS apps, chat channels, or internal tools, put those credentials and toggles into an environment-driven path instead of editing random config files by hand. If you later move to a hosted deployment model with broader app connectivity, platforms such as Donely integrations center that management around connected tools instead of scattered local secret files.
Keep network exposure narrow
Most self-hosted OpenClaw problems are not model problems. They're exposure problems. Someone binds too broadly, skips token auth, and assumes the box is “only on the home network.”
The safer default is local binding and explicit access mediation. Keep the gateway on loopback unless you have a strong reason not to. Then place remote access in front of it through the mechanism you trust and understand.
Use this mental model:
- Loopback bind: The gateway listens locally on the Mac mini.
- Authenticated access layer: Remote users connect through your chosen secure access path.
- Token enforcement: OpenClaw still expects authentication.
- Persistent state: Restarts don't reset the operational shape of the service.
If you expose first and harden later, “later” usually never comes.
At this stage, your OpenClaw Mac mini setup should survive a restart, keep its state, and come back with the same config every time. That's the minimum bar for calling it usable.
Security Hardening and Performance Tuning
The common failure in self-hosting is treating “it installed” as the finish line. It isn't. A local agent with weak auth, loose network binding, and an open device-management posture isn't production-like. It's exposed.
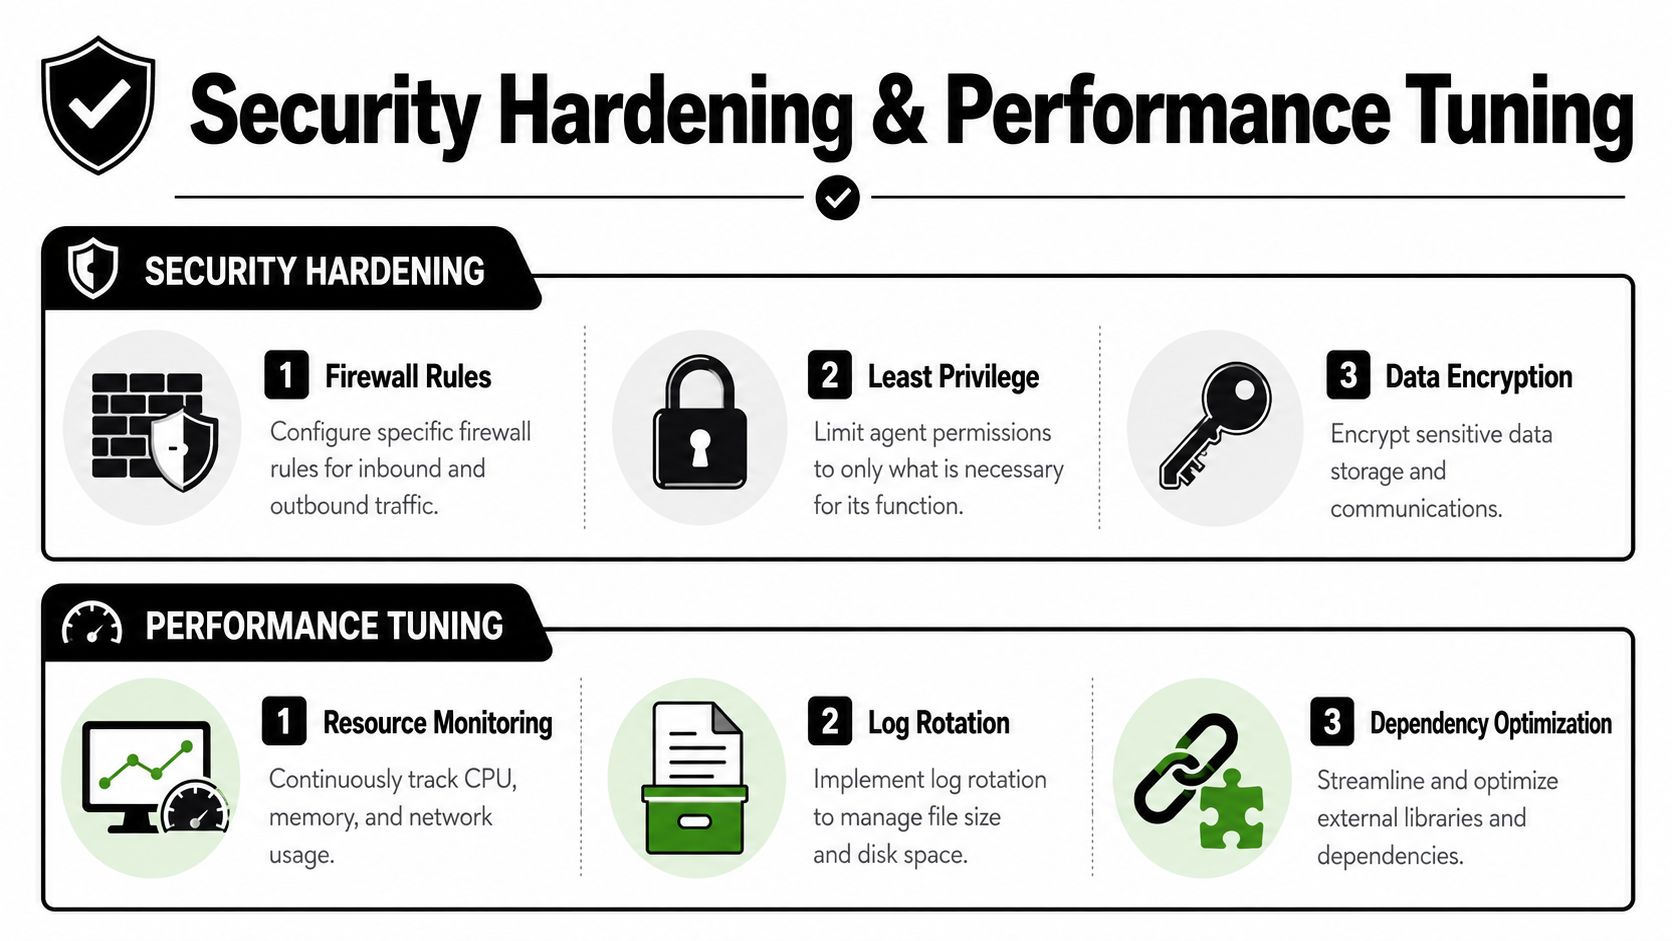
The security baseline that should not be optional
One independent secure-setup guide is very explicit about the baseline: enable the macOS Firewall and FileVault, bind the gateway to loopback, require token authentication, and keep DM policy in pairing mode. It says that baseline takes about 10 minutes and specifically warns against leaving DM policy set to open or skipping token auth, as described in this secure OpenClaw Mac mini setup guide.
That's the checklist I'd enforce first:
- Firewall on: The host should reject traffic you didn't intend to permit.
- FileVault on: If the machine is lost, sold, or physically accessed, disk encryption matters.
- Loopback binding: Don't publish the gateway directly unless you've designed for that.
- Token auth required: Local network trust is not authentication.
- DM pairing mode: Open is convenient right until it isn't.
To support that baseline, check your local service configuration and make sure it reflects your intent instead of whatever the installer defaulted to:
grep -E 'BIND|TOKEN|DM' ~/openclaw/config/openclaw.env
And verify the host protections separately in macOS settings. Security controls belong at both layers. The application cannot compensate for a sloppy host.
Here's a useful visual checklist before you move on:
Performance tuning that helps without adding fragility
Tuning matters, but not all tuning is worth it. The best changes are the ones that reduce contention and increase predictability.
Start with operational basics:
- Watch memory pressure: Don't run unrelated heavy desktop workloads on the same box.
- Rotate logs: Large logs don't just waste disk. They slow down troubleshooting and backups.
- Keep dependencies lean: Avoid installing side tooling you won't maintain.
- Prefer stable paths: Service files, scripts, and logs should live in fixed directories.
A simple log rotation helper can be enough on a single machine:
find ~/openclaw/logs -type f -name "*.log" -size +10m -exec gzip {} ;
That command isn't a full retention policy, but it shows the right idea. Keep disk use controlled before it becomes an outage source.
What usually goes wrong
The avoidable mistakes are repetitive.
| Mistake | Why it causes trouble | Better choice |
|---|---|---|
| Broad network bind | Exposes the gateway unnecessarily | Bind to loopback |
| No token auth | Anyone on the path may reach the service | Require tokens |
| DM policy left open | Weakens control plane access | Use pairing mode |
| Running on your primary user | Blurs personal and service boundaries | Use a dedicated machine or account |
| Unverified skills | Expands risk surface fast | Add only what you trust and need |
Security on a Mac mini host is mostly about restraint. Fewer exposed surfaces, fewer installed extras, fewer assumptions.
Ensuring Long-Term Reliability and Recovery
Most OpenClaw Mac mini setup guides stop as soon as the agent answers a prompt. That's not the hard part. The hard part starts when nobody is watching the machine.
A detailed 2026 guide argues that the primary operational issue is long-tail uptime and unattended recovery, not one-time installation. It recommends enabling Start automatically after power loss, using Time Machine, and adding a watchdog LaunchAgent that checks launchd every 15 seconds and re-registers the gateway if it disappears, as discussed in this operational reliability walkthrough.
Power loss is not an edge case
Treat reboot and power interruption as normal events. If the machine is going to sit headless, restart behavior has to be intentional.
At minimum:
- Enable automatic start after power loss in macOS.
- Confirm your user or service context comes back cleanly after boot.
- Test a real reboot, not just a process restart from the same shell.
- Keep backups current so config corruption isn't a rebuild event.
A lot of setups fail here because they rely on a terminal session or a one-time manual launch. That works until the host restarts at the wrong moment.
Use a watchdog for gateway recovery
If the gateway can disappear after a crash or failed self-restart, add a watchdog. On macOS, the clean way is a LaunchAgent plus a small script that verifies the service remains registered and, if not, boots it back into launchd.
A lightweight watchdog script might look like this:
#!/bin/bash

JOB_LABEL="ai.openclaw.gateway"
PLIST="$HOME/Library/LaunchAgents/ai.openclaw.gateway.plist"

if ! launchctl print "gui/$(id -u)/$JOB_LABEL" >/dev/null 2>&1; then
  launchctl bootstrap "gui/$(id -u)" "$PLIST"
fi
Save that under your scripts directory, make it executable, then call it from a LaunchAgent on an interval.
Basic workflow:
- Create the watchdog script
- Make it executable with
chmod +x - Create a LaunchAgent plist that runs it periodically
- Load it with
launchctl bootstraporlaunchctl load - Test by stopping the gateway and confirming recovery
This is the part that turns a hobby install into unattended infrastructure. Without recovery automation, you still own every weird restart edge case personally.
Scaling Up From Local Host to Managed Platform
A local Mac mini is a good fit when you want direct control, low ongoing infrastructure overhead, and one place to run a personal or small business agent. It's especially sensible when you want to keep the operational model simple and you're comfortable maintaining the box yourself.
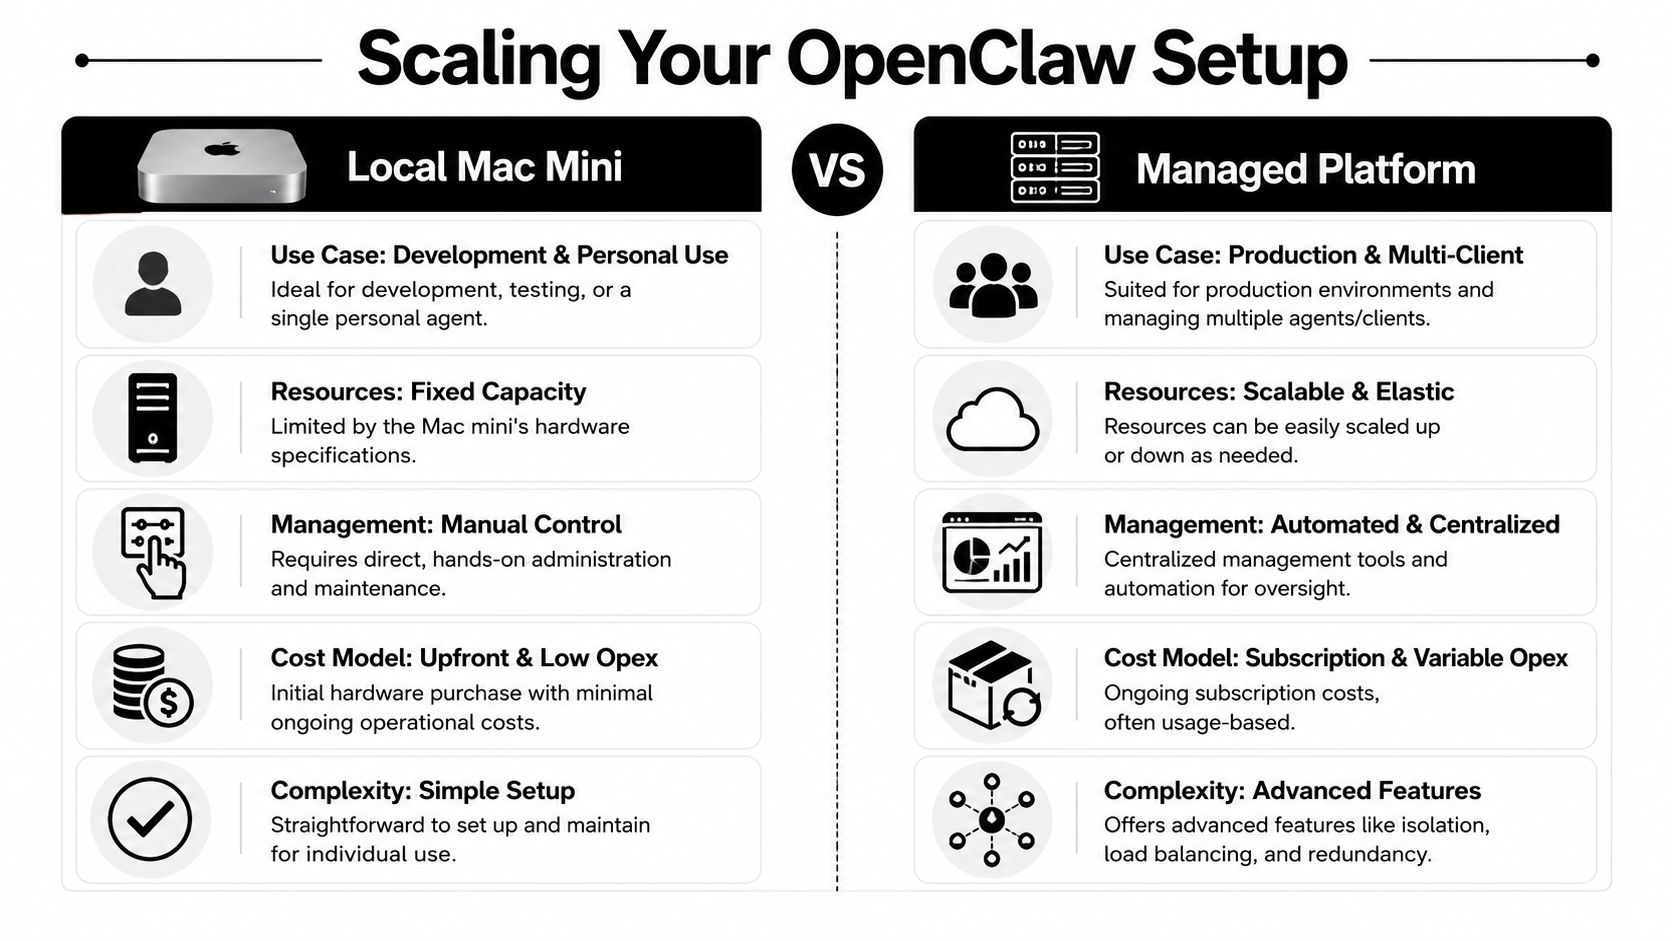
When local hosting still makes sense
Local hosting works well for a narrow scope:
- Single-owner environments: One builder, one machine, one operational context
- Fixed hardware expectations: You know exactly what the Mac mini will be doing
- Hands-on maintenance: You don't mind handling updates, logs, and recovery yourself
The upside is control. The downside is that every new instance, user boundary, or client environment becomes your problem to isolate and operate.
When a managed platform is the better operational choice
The equation changes when you need multiple isolated agents, client separation, centralized monitoring, or cleaner access control. At that point, you're not just hosting OpenClaw. You're running an internal platform.
A managed option such as Donely OpenClaw hosting is built for that different stage. The practical difference isn't magic. It's reducing the amount of launchd, secret handling, per-instance segregation, and ongoing maintenance you need to own yourself.
A simple comparison:
| Factor | Local Mac mini | Managed platform |
|---|---|---|
| Control | Full host control | More abstracted |
| Isolation | Manual to design and maintain | Usually built into the platform model |
| Ops work | You handle updates and recovery | Provider handles more of the platform layer |
| Best fit | Personal, experimental, small-scope | Multi-instance, client-facing, operationally heavier |
The right choice depends on whether you want to manage agents or manage the infrastructure around them.
If you want OpenClaw without owning the day-to-day platform work, Donely offers a unified way to host, deploy, and manage OpenClaw-based AI employees from one dashboard, including isolated instances, centralized monitoring, and built-in integrations. For a solo builder, a Mac mini is often enough. For a team, agency, or multi-client setup, moving the operational burden off the local box can be the cleaner path.